Connecting to eduroam

Tech Note 225

Connecting to eduroam

Introduction

DeNovix instruments are compatible with eduroam using login credentials provided by your institution. Watch the video below, or follow the steps outlined in this technical note to connect to the eduroam network.

1. Settings

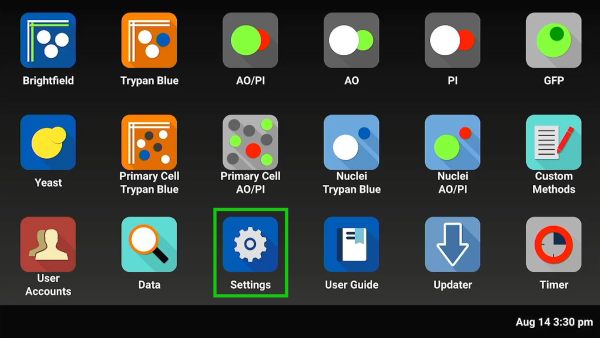
a. Open Settings app
CellDrop homescreen
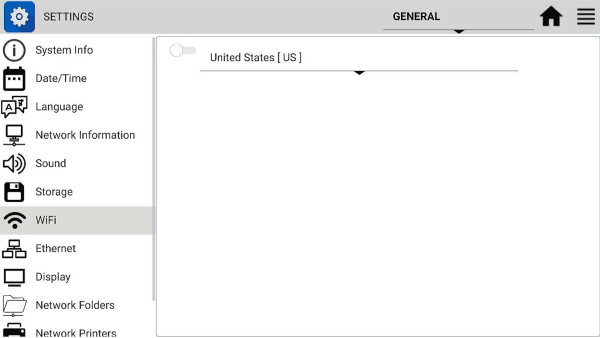
b. Navigate to the Wi-Fi tab
Settings app, Wi-Fi tab
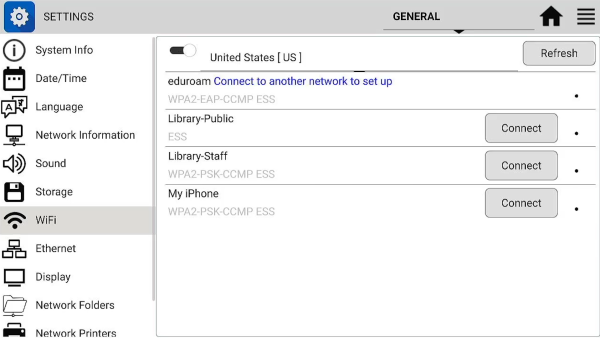
c. Turn on Wi-Fi.

Press “Refresh” if all expected SSIDs are not showing immediately.

Settings app, Wi-Fi tab
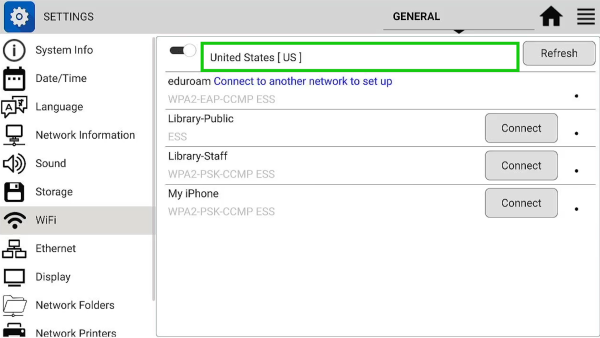
d. Select Country

Use the dropdown at the top of the screen to select the country you are currently in. Wi-Fi frequencies are country specific and the correct country should be selected. If a new country is set, follow instructions and reboot the instrument.

Settings app, Wi-Fi tab, country dropdown highlighted

2. Connect to Wi-Fi

a. Connect to Network

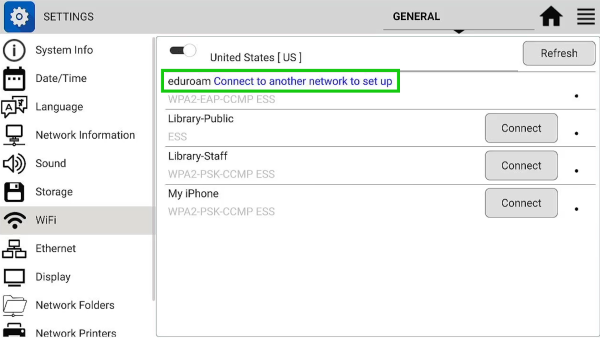
Select another network to connect to in order to download the eduroam installer

  • Note: Before eduroam can be set up, the instrument first must be connected to another network (hotspot, open Wi-Fi SSID, etc.)
Settings app, Wi-Fi tab, eduroam connection requirement highlighted
b. Enter Password / Accept Terms

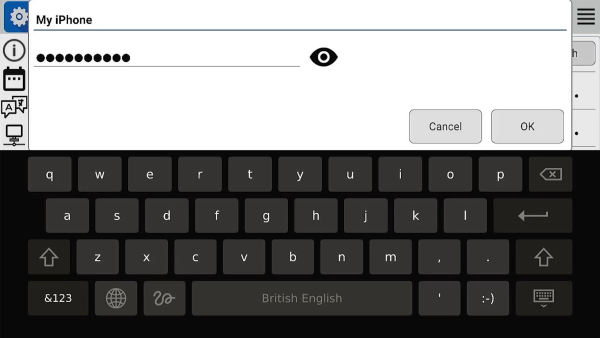
Enter password and press “Ok” or accept the terms of an open Wi-Fi portal.

Settings app, enter Wi-Fi password
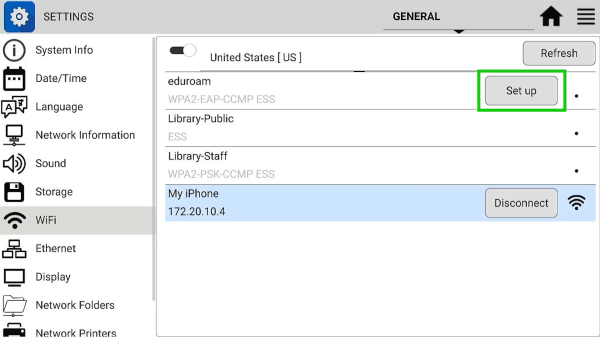
c. Button next to the eduroam SSID will now say “Set up”
Settings app, Wi-Fi connected, eduroam now says "set up"

3. Download eduroam Installer

a. Press the “Set up”

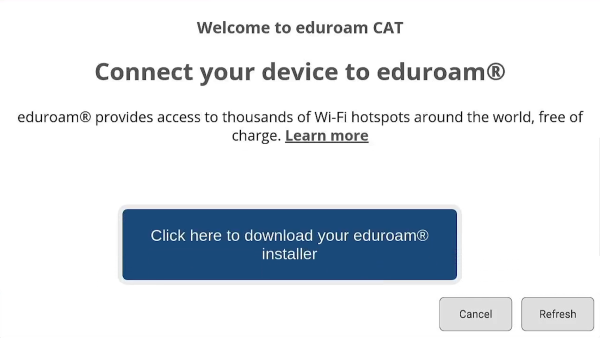
Press the “Set up” button next to eduroam, and the eduroam webpage will open.

b. Navigate to Installer Page

Scroll to bottom and select “Click here to download your eduroam® installer”

eduroam page download installer
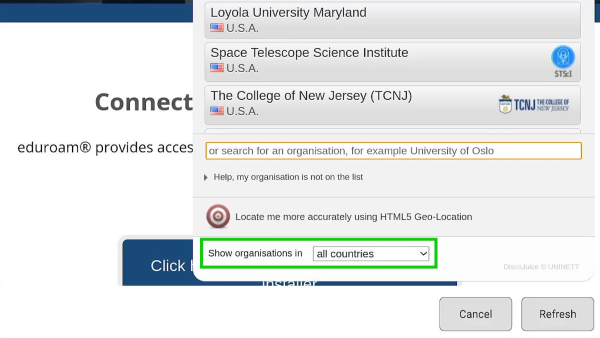
c. Choose Country

Under “Show organisations in…” select your country or “all countries”

eduroam installer, choose country dropdown
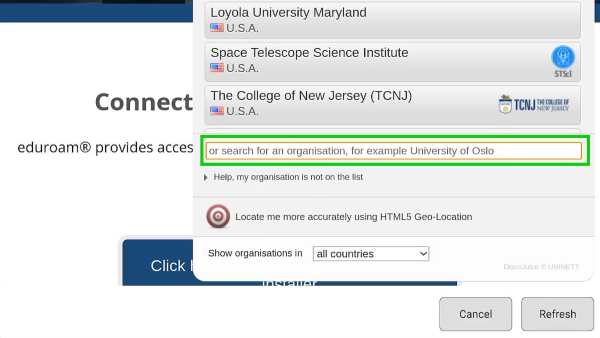
d. Search for Institution
  • Note: If the institution does not appear, your university may have a custom installation of eduroam managed by a third party organization. Eduroam activation will not be possible unless the institution shows on the list of selections. The list of supported institutions can also be viewed at https://cat.eduroam.org.
eduroam installer, search for institution
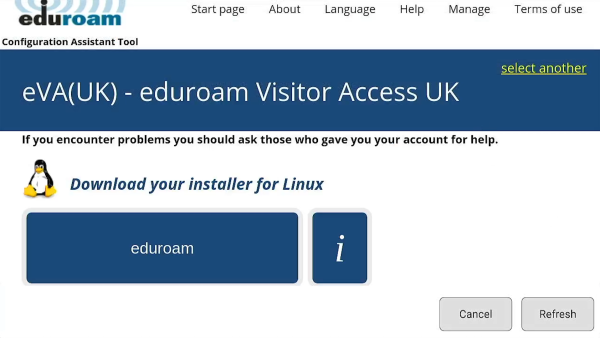
e. Select Institution & Download

Select your institution and navigate to their page. Press the button to downtown the installer for Linux.

eduroam installer, list of institutions
Download eduroam installer for Linux
f. Return to Settings

Instrument will automatically return to Settings once the download is complete

g. Button next to eduroam SSID will now say “Connect”
TN 225 Step 3g

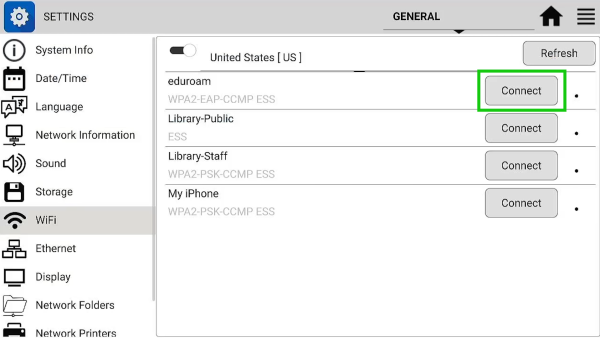
4. Connect to eduroam

a. Press the “Connect” button next to eduroam
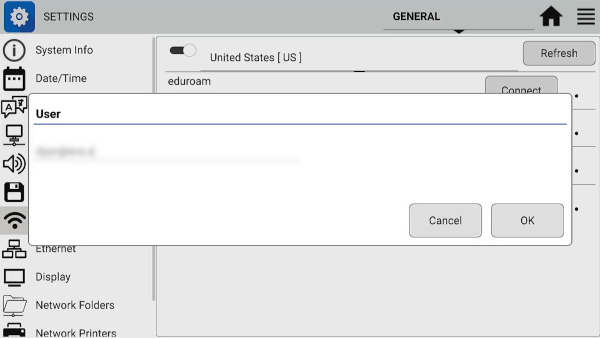
b. Type in the username provided by your institution, then press “Ok”
Enter eduroam username
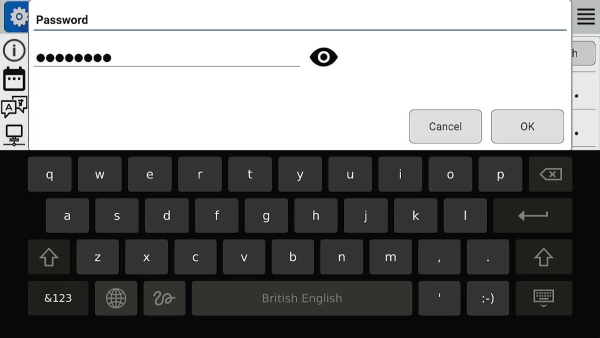
c. Type in the password provided by your institution, then press “Ok”
Enter eduroam password
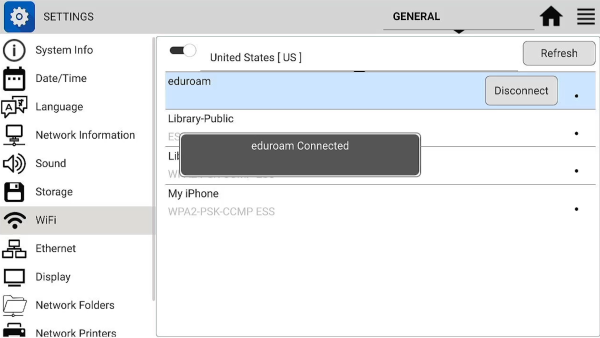
d. Confirmation Message

A confirmation message will appear to show that eduroam has been connected.

  • Note: If connection fails at this step, ensure that you have the correct login credentials from your institution.
eduroam connected
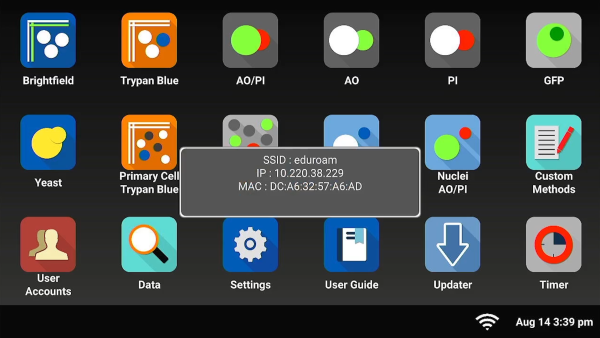
e. Check Wi-Fi Icon

The Wi-Fi icon will appear on the bottom bar of the home screen. When pressed, it will show “SSID: eduroam” at the top

CellDrop homescreen, eduroam SSID info

If you have any questions or are having trouble connecting, please contact our technical support team at techsupport@denovix.com.

10-OCT-2023