tech note 205, email setup

Technical Note 205

Email Setup

Introduction

Specified DeNovix instruments have software that enables users to export and send data via email. This document will explain how to set up and manage email accounts on instruments with Linux software.

Email

Screen captures, data .csv files, and PDF reports may be exported via email for instruments with WiFi or Ethernet connectivity.

It is recommended that a free, dedicated Gmail or Outlook account be used for outgoing email from the instrument. Follow instructions to create a two factor authentication (2FA) “app passwords” for the account in order to ensure emails can use current SMTP and TLS protocols.

Email Setup

  1. Create an Email account to use on the instrument.
  2. Ensure that the instrument is connected to WiFi or Ethernet by checking the Network Information in the Settings app.
  3. From the Settings App, scroll down the left navigation bar until the Email option is visible, then select Email.
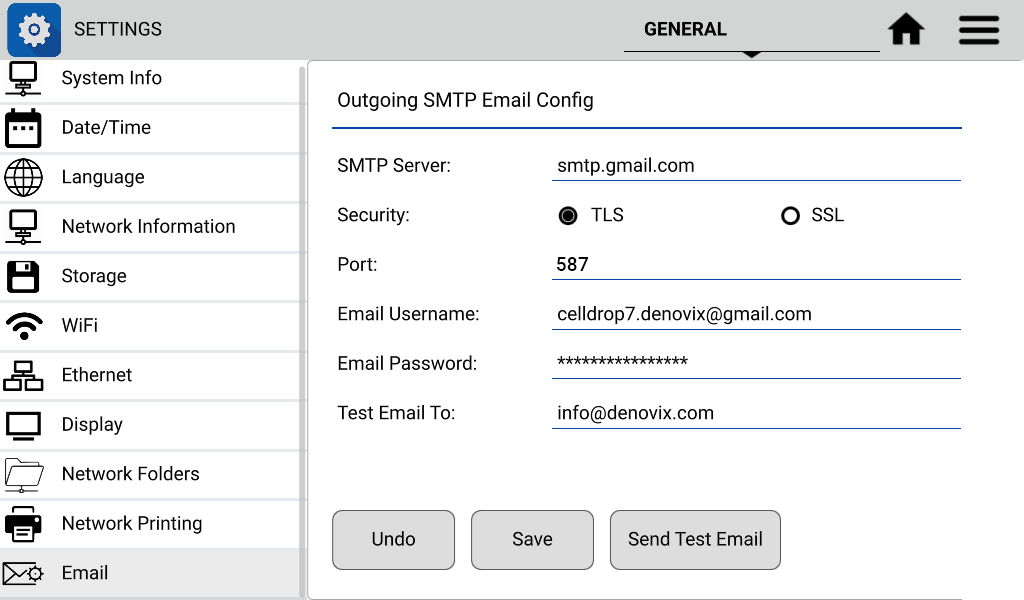
  4. Input Outgoing Server Information for the Email account. The SMTP server, security type, and port are accessible from the Email account settings.
  5. Enter the Email address in the Email Username field.
  6. Enter the Email account password.
  7. Press the Save button.
  8. Optional: Enter a Test Email address and press save. Send a test email and check that the set up was successful.

Example Gmail Email Setup

Follow the guidelines below when setting up a 2FA app password Gmail account. Similar procedures can be followed for setting up an Outlook email address with an app password.

  • SMTP Sever: smtp.gmail.com
  • Security: TLS
  • Port: 587
  • Email Username: sending email address
  • Email Password: sending email account password
  • Test Email To: not required, but account that a user can easily access to check for test email
Typical SMTP Outgoing Email Configuration
Figure 1: Typical SMTP Outgoing Email Configuration

Authorize Instrument for Gmail

1. From a browser, log in to the google account created for the instrument email.
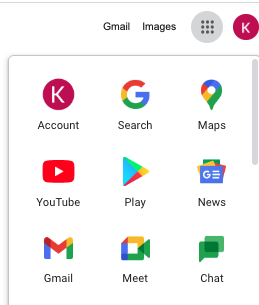
2. In the top right corner of the browser, open up the google apps selector and click “Account”.
3. From the left nav bar, select “Security”.
4. Under “Signing in to Google”, Click ‘2-Step Verification’.
5. Enter a phone number to associate with the account. Follow the on screen instructions to send, receive and enter a verification code.
6. Activate “2-Step Verification” and turn it on.
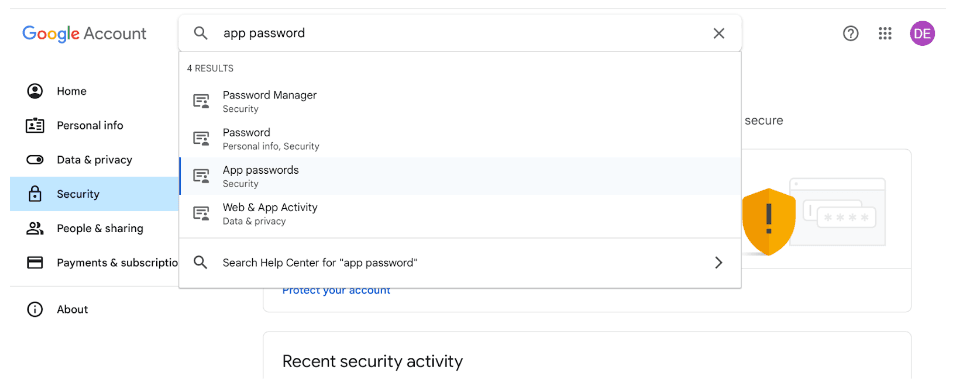
7. After activating “2-step Verification,” go back to the security tab and search “app password” in the Google Account search bar.
Search for App Password

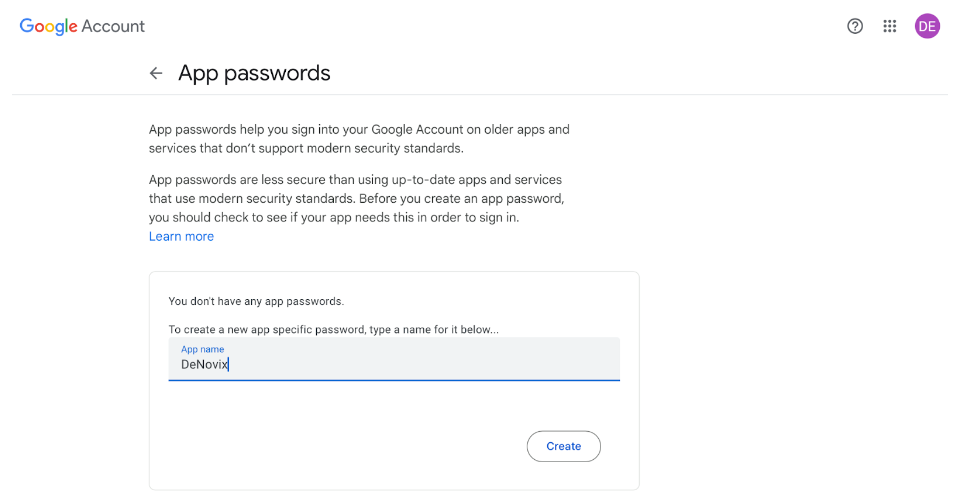
8. On the app password page, enter the device name and click create. If you plan to use the same email for all DeNovix devices, enter “DeNovix” as the App name.
Enter Device Name
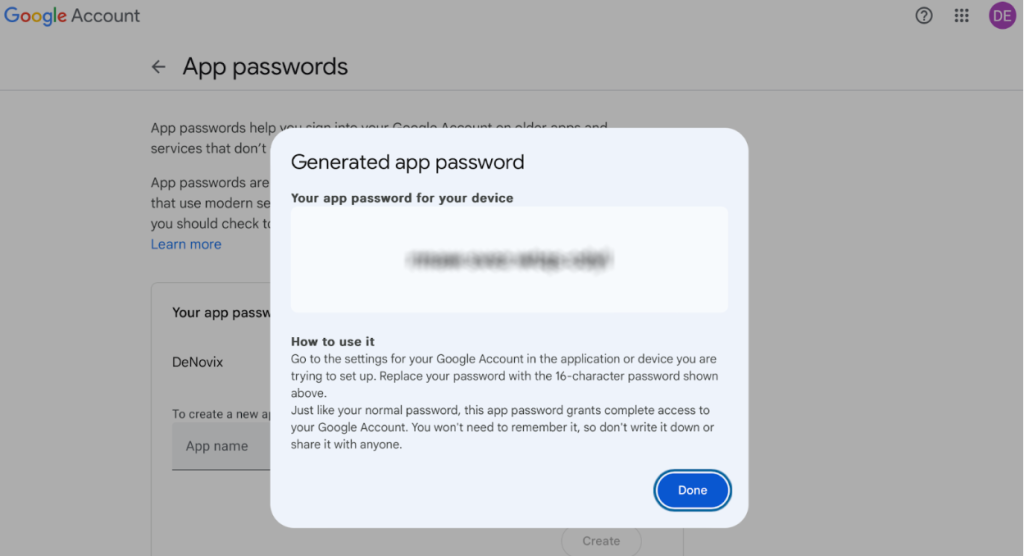
9. A pop up dialog box with a 16-character app password will be displayed. Copy the password accurately as you will not be able to access it once closed.
Generated password
10. The new password is now active for this device and shows up on the list of authorized devices.
Email Setup_App Passwords
11. In the Settings app / E-mail Tab you will use the gmail account email address and the new 16 character password when setting up the email account.


SMTP Server: smtp.gmail.com
Security: SSL
Port: 465
Email: Gmail account full email address
Email password: 16 character generated password.
Enter a “Test Email To” address.
Click Save.


12. Click “Send Test Email” to verify the set up.

Frequently Used Email Accounts

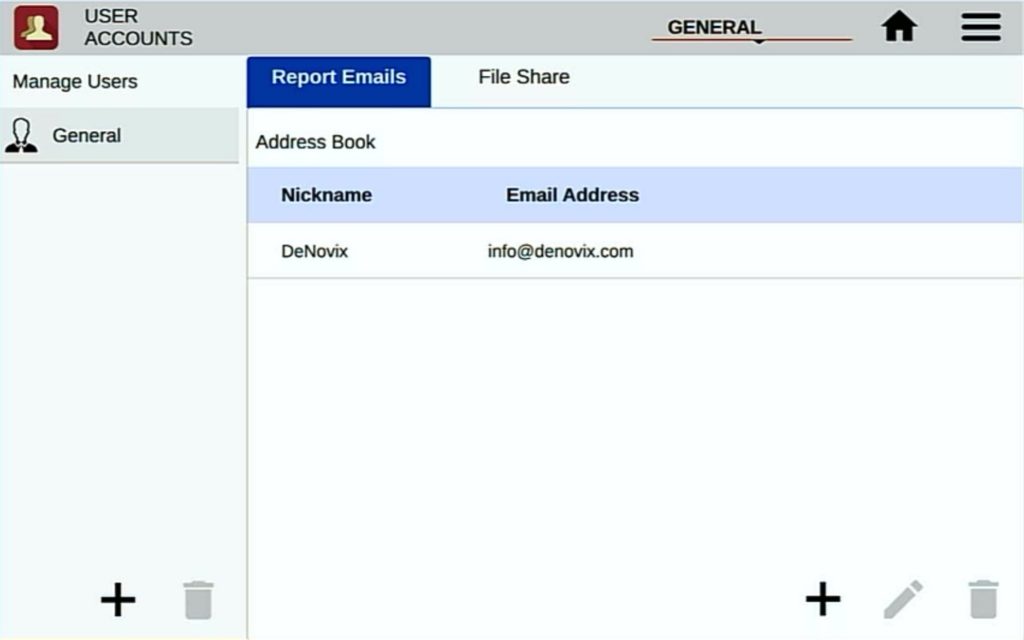
Use the Account app Address Book function to save frequently used recipient email addresses. This feature is accessed from the Accounts app screen, shown below.

Access user and administrator account settings by selecting the account from the drop down menu in the upper right corner of the screen. The default account selected is the General account.

Add or select an account from the left screen panel to see the settings for the associated user account. Tap the plus button on the bottom right of the screen to add an email to the address book for the account selected.

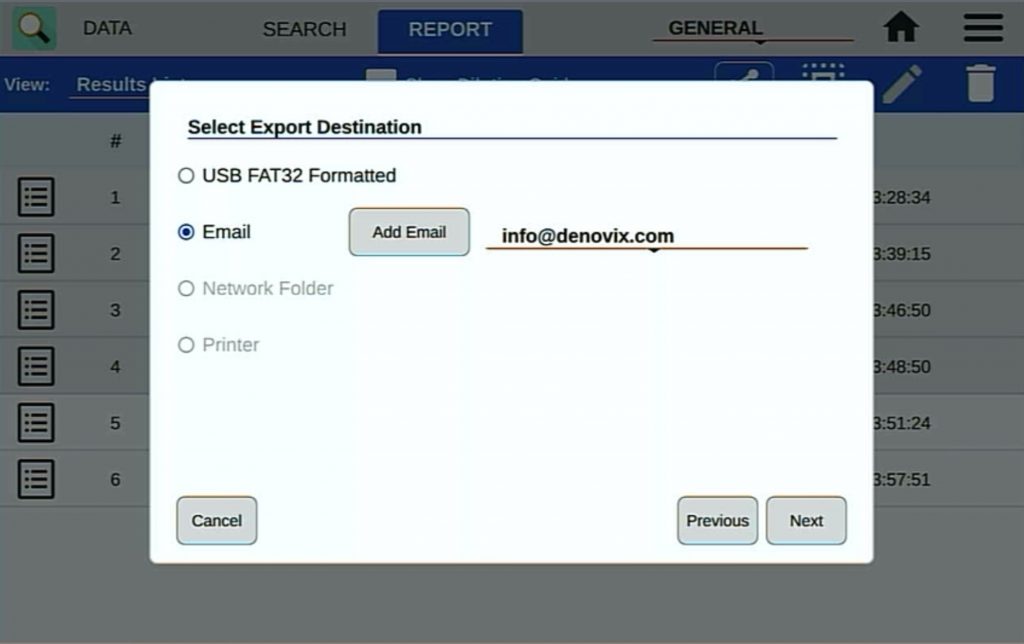
Screen Captures or Data Via Email

  1. Select the Screen Capture or Export Selected Data function from the measurement app's Overflow menu. Note: Measurement results may also be accessed at any time using the Data app.
  2. Select the Email option using the radio button selector.
  3. Use the drop-down menu next to the radio button to select an address already saved in the Address Book.
  4. Click the Next button on the bottom right to continue
  5. Enter a subject and message if desired and tap the Send button.
Figure 4: User Account App Can Be Used To Save Frequently User Email Addresses
Figure 5: Data and Screen Captures Can be Export Via Email

Summary

All specified DeNovix instruments are equipped with email functionality. Contact DeNovix customer support for data export related questions. For instrument specifications, click here (DS-Series comparison) or here (CellDrop Automated Cell Counters comparison).

For internet or server related issues, refer to your local IT support group for additional assistance.

20-DEC-2024